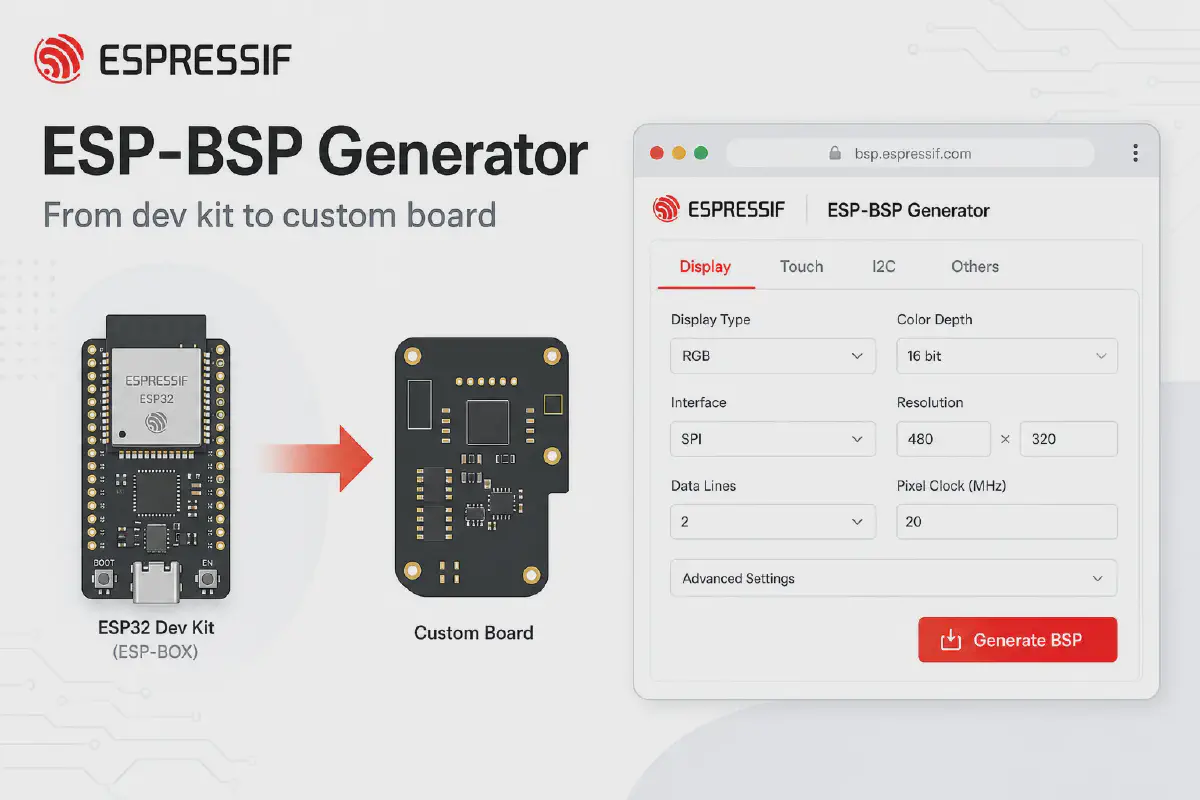

The ESP-BSP Generator bridges that gap: start from a proven esp-bsp board, select pins and features in a visual form, and download a production-style BSP component for your hardware while keeping the same APIs your code already uses.
The problem every custom board hits#
You or your software team creates a prototype on ESP32-S3-BOX-3, ESP32-C3-LCDKit, M5Stack Tab5, or another board from esp-bsp. Display, touch, audio, SD card work perfectly because Espressif maintains the BSP.
Then the hardware team designs a custom board with a different touch controller, pin mapping, and without a speaker. Now you have to partially start from scratch.
There is a better workflow.
Start with what already works#
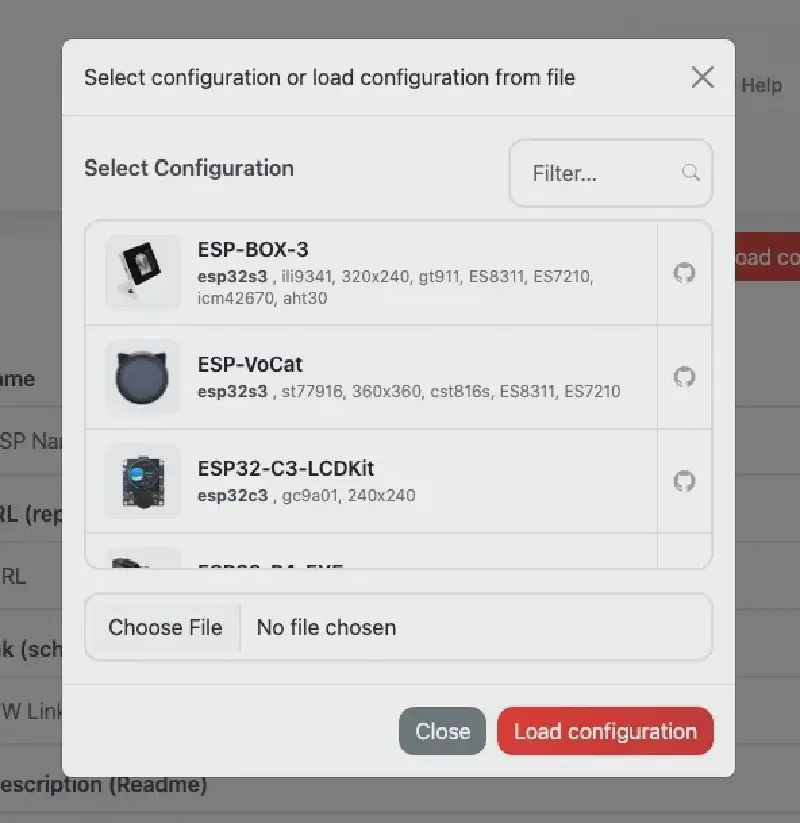
- Open the ESP-BSP Generator.
- Click Load configuration and pick a starter board that matches your prototype (e.g. ESP-BOX-3, ESP32-S3-EYE, ESP32-C3-LCDKit).
- The form fills in MCU, features, drivers, and pin assignments - the same structure as the official BSP in esp-bsp/bsp/.
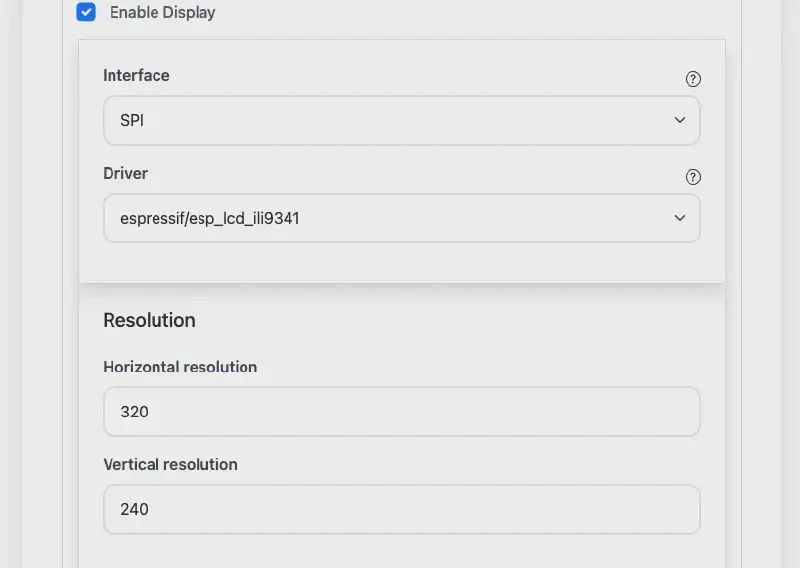
Configure features for your PCB#
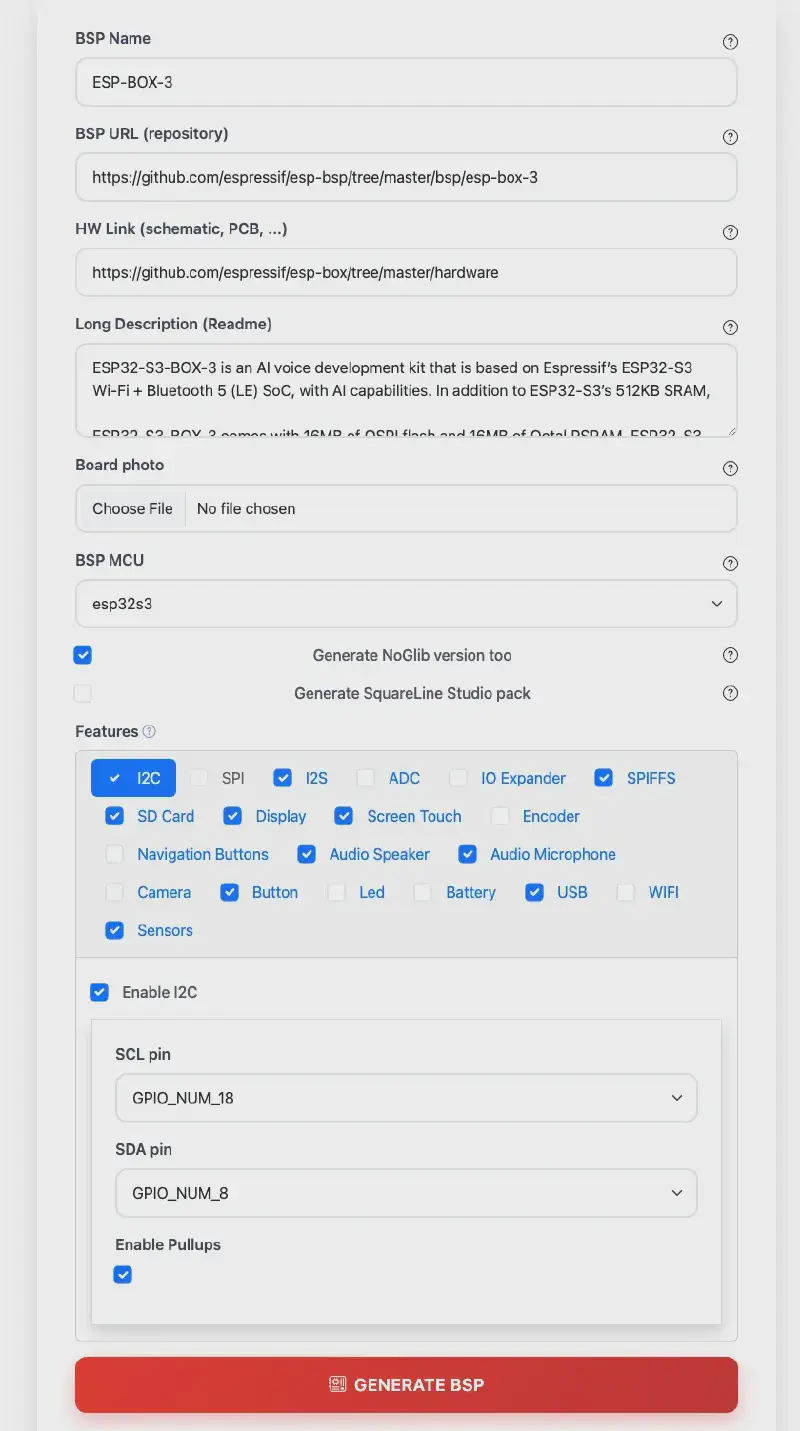
Each capability is a feature tab: Display, Touch, Buttons, Audio, SD card, Camera, sensors, USB, battery, and more. Enable what your schematic actually has; disable what you removed.
Typical custom-board edits:
| On the dev kit | On your custom board |
|---|---|
| 3 navigation buttons | 2 buttons, different GPIOs |
| FT5x06 touch on I2C | Same controller, different I2C pins |
| RGB LCD + backlight PWM | SPI display, fixed backlight |
| On-board microphone | No audio - tab stays off |
The generator checks dependencies (touch over I2C needs I2C enabled, and so on) before it builds anything.
Hover the ? icons for hints. Upload a board photo for the generated README. Save the JSON - that file is your single source of truth for the board definition.
Generate once, integrate like any esp-bsp component#
Click Generate BSP. You get a ZIP with:
- A full ESP-IDF component (
CMakeLists.txt,Kconfig, headers, sources) sdkconfig.defaultsgenerated to your choicesREADME.mdwith capabilities and dependency tableAPI.mdAPI reference (Doxygen-style, same idea as official BSPs)- Optional noglib variant (BSP without LVGL)
- Optional SquareLine Studio OBP pack for UI designers
Your application keeps calling the same BSP entry points:
#include "bsp/esp-bsp.h"

void app_main(void)
{
    bsp_display_start();
    bsp_display_backlight_on();
    // ... your UI / logic unchanged in spirit
}
Wire the new component in main/idf_component.yml:
dependencies:
  my_custom_board:
    path: ../components/my_custom_board
Copy sdkconfig.defaults to the project root, set the target, build. The application structure stays familiar - only the board layer changed.
Swap the component, keep the software#
This is the payoff for product teams:
Prototype firmware  →  uses esp-box-3 BSP from esp-bsp
Production firmware →  uses my_custom_board BSP from the generator
Application code    →  largely the same #include and BSP APIs
You are not maintaining a fork of esp-bsp forever. You maintain a small, generated board package that follows the same conventions as espressif/esp-bsp: component layout, bsp_* helpers, LVGL integration via esp_lvgl_port, examples you can compare under esp-bsp/examples/.
ESP-IDF upgraded? Regenerate, don’t rewrite#
Saved configuration JSON is more than a backup. When:
- ESP-IDF moves to a new major version,
- esp-bsp templates or drivers change,
- you add a feature you skipped in v1 (e.g. SD card on the next PCB spin),
…load the JSON in the generator, adjust what changed, and Generate BSP again.
You refresh pins, Kconfig, and generated sources from the template — instead of merging hundreds of manual edits across C files.
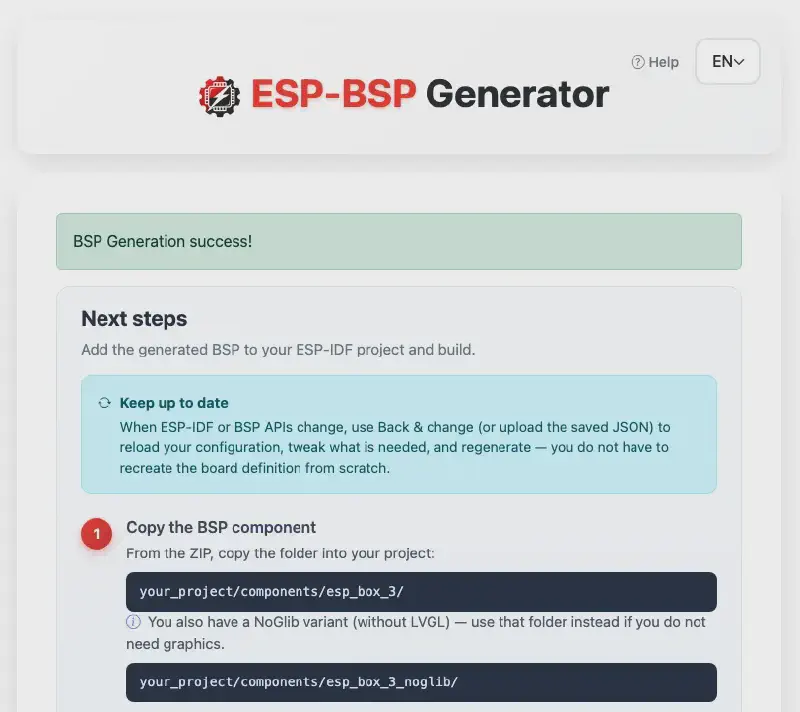
The success page walks through integration steps; the in-app Help modal covers load/save, features, and SquareLine OBP install paths.
Why esp-bsp + the generator together#
| esp-bsp | BSP Generator | |
|---|---|---|
| Best for | Official Espressif & partner boards | Your custom PCB |
| Maintained by | Espressif BSP team | Generated from shared templates |
| API style | bsp_*, LVGL port, examples | Same patterns |
| Registry | Components on components.espressif.com | Your idf_component.yml + path or publish later |
Use esp-bsp as reference and dependency where it fits. Use the generator when the schematic is yours.
SquareLine Studio? Covered.#
If your flow includes UI design, enable Generate SquareLine Studio pack (Display required). The ZIP includes an Open Board Platform bundle (.slb, .zip, .png) ready to copy into ~/SquareLine/boards/ - designers stay in SquareLine; firmware stays on the same BSP pins and resolution you defined in the form.
Try it in five minutes#
- Go to bsp-generator.espressif.tools
- Load
ESP-BOX-3or any starter board close to your hardware - Change one GPIO, rename the BSP, click Generate
- Drop the component into a blank ESP-IDF project and
idf.py build
Explore official boards and docs in github.com/espressif/esp-bsp - then make the generator your shortcut from dev kit to custom product.